OPTASY: Drupal Web Development Agency Toronto
(416) 243-2431Drupal SupportRequest A QuoteQuote

Main navigation

  • Home
  • Services
    • Digital Strategy
    • Design
    • Web Development
      • Drupal
      • WordPress
      • Magento
      • Laravel
      • Shopify
      • Sharepoint
      • Contentful
      • Gatsby
      • Next.js
      • Node.js
      • React
      • AngularJS
    • Mobile & App
      • IOS
      • Android
      • Augmented Reality
      • Artificial Intelligence
      • Virtual Reality
    • Maintenance & Support
      • Drupal Maintenance
      • Wordpress Maintenance
    • Staff Augmentation
  • Portfolio
    • Web
    • Mobile
    • Ar
  • About
    • Who we are
    • Values
    • Events
    • Awards
    • News
    • Careers
    • Partners
      • Acquia
      • Google
      • Pantheon
      • Shopify
      • Wordpress
  • Blog
    • Drupal
    • Drupal 8
    • HTML
    • CSS
    • Javascript
    • PHP
    • Microsoft
    • Web Design
    • Design
    • Tips
    • News
  • Contact
(416) 243-2431 Drupal Support Request A QuoteQuote

In light of the recent COVID-19 pandemic - OPTASY would like to offer DRUPAL website support for any Healthcare, Government, Education and Non-Profit Organization(s) with critical crisis communication websites or organizations directly providing relief. Stay Safe and Stay Well.

What Is the Best WordPress Plugin for Posting to Social Media? Top 5
Tips

What Is the Best WordPress Plugin for Posting to Social Media? Top 5

by Adriana Cacoveanu on Sep 14 2018

Repetitive (not to say boring), time-consuming... And it all gets even more cumbersome when you add more authors to the equation and you increase frequency to more than just 2 posts a week. Yes, I am talking about regularly sharing your blog posts on your social media. But what if you could just schedule them and create your own calendar? And automate the whole process? Then, the question that arises is:  “What is the best WordPress plugin for posting to social media?”

One perfectly equipped to:


  • cope with an above-the-average posting frequency 
  • work in the context of a multi-author WordPress blog
  • re-post old posts, as well
  • track the overall success of your posts


And there sure are lots and lots of “luring” WordPress plugins to schedule posts, so:

Which one best meets all your particular requirements?

Let me give you some clues here. 5, to be more specific:

WordPress' Default Feature for Scheduling Posts: Main Limitations

Let's not jump straight to the WordPress plugins to schedule posts for social media before we've evaluated what the platform's built-in feature offers us, in this respect.

For, you can very easily schedule your blog posts to social media in WordPress without the need of a plug-in solution.

Here's how this out-of-the-box functionality works:


  • you go to Settings > General, in your admin panel
  • you set your Timezone (since WordPress uses Universal Time by default)
  • next, once you're ready to hit the “Publish” button and launch your blog post “out into the wild”, just hit the “Edit” button next to it
  • … and set the time and date that you'd like your post to be shared on social media
  • then, you click the “Schedule” button


And that's it! Your post will get automatically published according to your preferences of time and date.

But what if:


  • you'd need to go through this process several times... a day?
  • there are several authors posting on the same blog and, implicitly, sharing content on the same social media accounts?


For more complex expectations about your scheduler, you go with a plugin. With the best WordPress plugin for posting to social media, that should meet all your requirements.


1. Blog2Social

A hands-off solution to rely on for both:


  • automating your posting on social media; from your WordPress blog straight to your social media networks
  • scheduling their publishing; you get to set a specific time for your posts to go live


It will automatically share your content on LinkedIn, Pinterest, Medium, Twitter...

Best WordPress PLugin for Posting to Social Media: Blog2Social

Screenshot: WordPress.org 

Features you'll love:


  • automated posting to several social media networks
  • setting the time and date that you want your posts to be published
  • tracking and monitoring your posts' success on each network
  • tailoring your posts' templates so that they fit each network's specifications
  • you're allowed to select the right images for your posts
  • automated re-publishing of your scheduled old posts


2. Social Auto Poster    

If this is not the best WordPress plugin for posting to social media, then it's definitely the most flexible one:

You get to configure it to the slightest detail; to fine-tune it till it meets even your “overly” specific needs. Moreover, it enables you to auto-share both new and older blog posts.
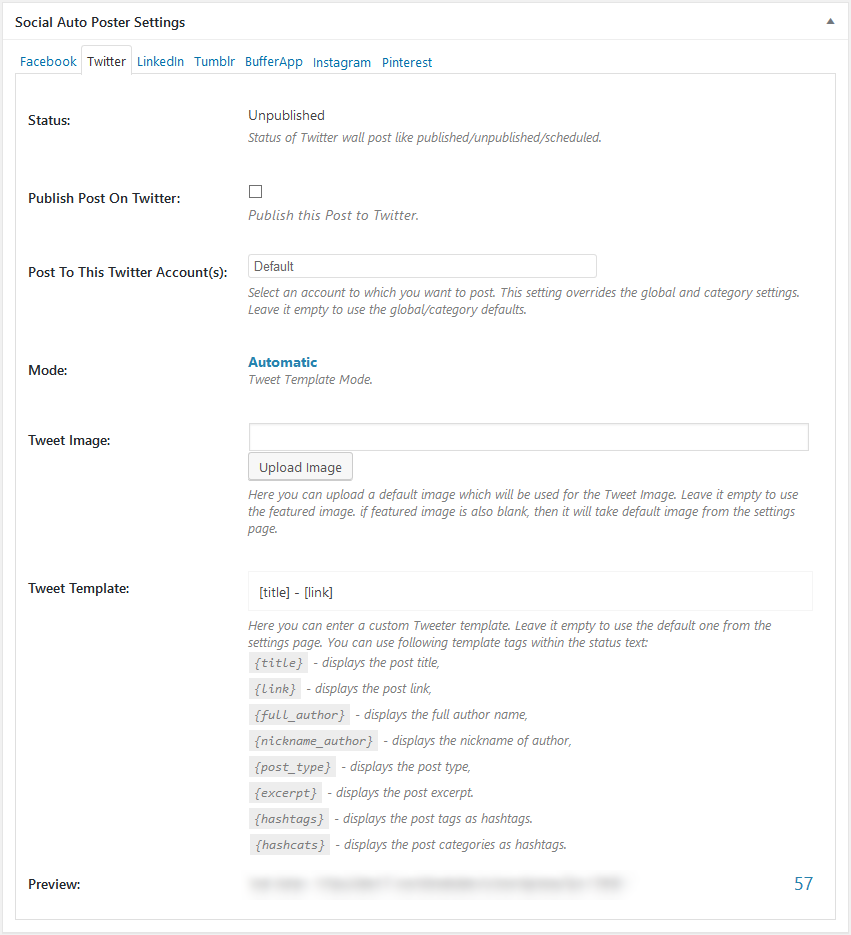
Best WordPress PLugin for Posting to Social Media: Social Auto Poster

Screenshot: Codecanyon.net

Top features:


  • choosing the post type to be shared
  • auto-sharing new blog posts to those specific social networks that you will have selected
  • custom scheduling: set the most suitable days and hours for sharing content on social media
  • auto-posting to all your linked Facebook accounts
  • supporting any kind of format: post, eCommerce products, page, custom post type


A social auto-poster WordPress plugin that's conveniently compatible with a whole “plethora” of networks: Tumblr, Facebook, Twitter, Pinterest, Instagram... 


3. NextScripts  

Here's another “must-check” WordPress plugin that's loaded with social media integrations.
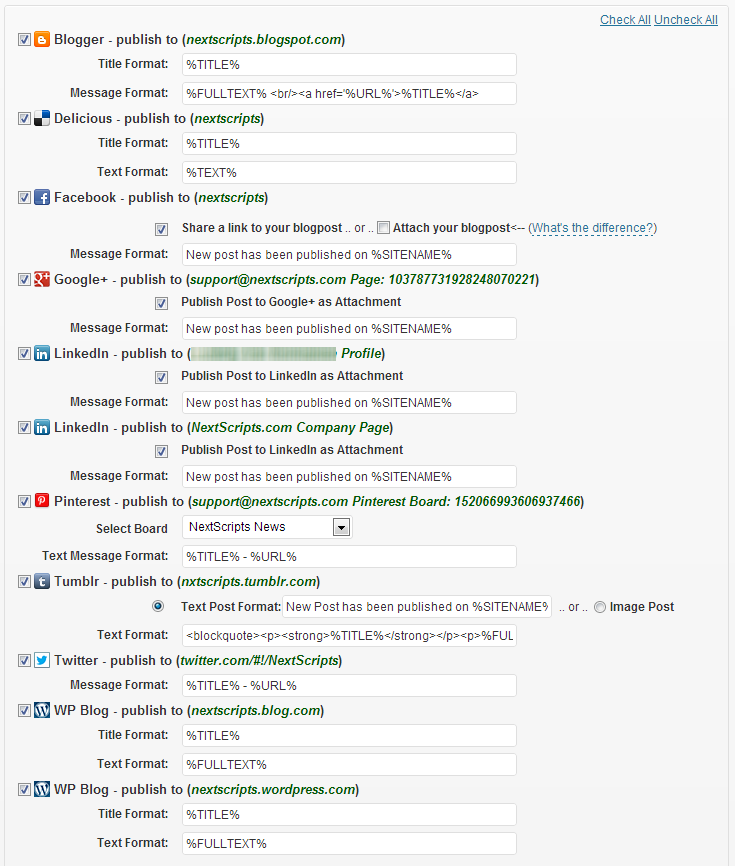
Best WordPress PLugin for Posting to Social Media: NextScripts

Screenshot: WordPress.org

Let us look over some of its “hard-to-resist-to” features:


  • automatically sharing both new and older posts
  • you're free to configure which posts should and which ones shouldn't get published
  • … and also the time and date for publishing them
  • you're also free to delay your scheduled posts
  • auto-importing mentions/comments from your social media accounts as WordPress comments


4. Revive Old Post  

Is keeping the same level of consistency — through regular posting at... regular times of the day/week — getting a bit challenging? Maybe, at times, you have no fresh content to share with your visitors...
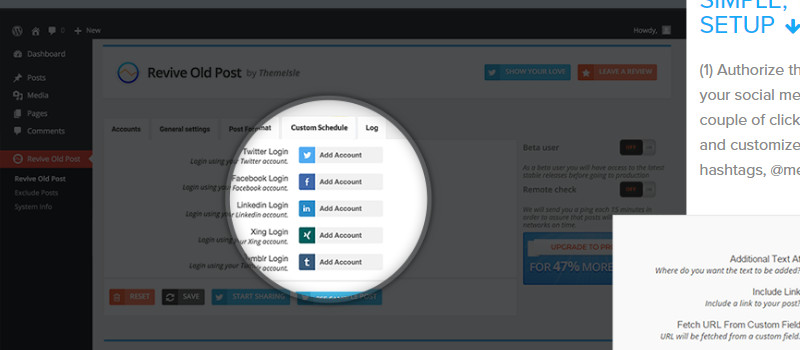
Best WordPress PLugin for Posting to Social Media: Revive Old Post

Screenshot: Revive.Social

Then how about bringing some of your old articles back into the spotlight?

Especially since you have Revive Old Post at hand, probably the best WordPress plugin for posting to social media.

Once you've set everything up, the plugin turns into a 100% hands-off solution. You'll be putting the whole process of re-posting old content on... autopilot.

But, let us go through some of this plugin's key features.

Basically, it empowers you to set:


  • the age of the posts to be re-published
  • the number of posts to be posted per day
  • the posting frequency
  • how many times the same old post can be posted
  • the format of the posts to be shared on social media


Note: once plugged in, the Revive Old Post enables you to track the traffic that re-sharing these old posts will bring on your blog, right in Google Analytics.


5. Auto Post Scheduler ​​​​​​

It makes the best WordPress plugin for posting to social media especially in the case of a multi-author blog. One with a high volume of content drafted for being published on a daily basis.
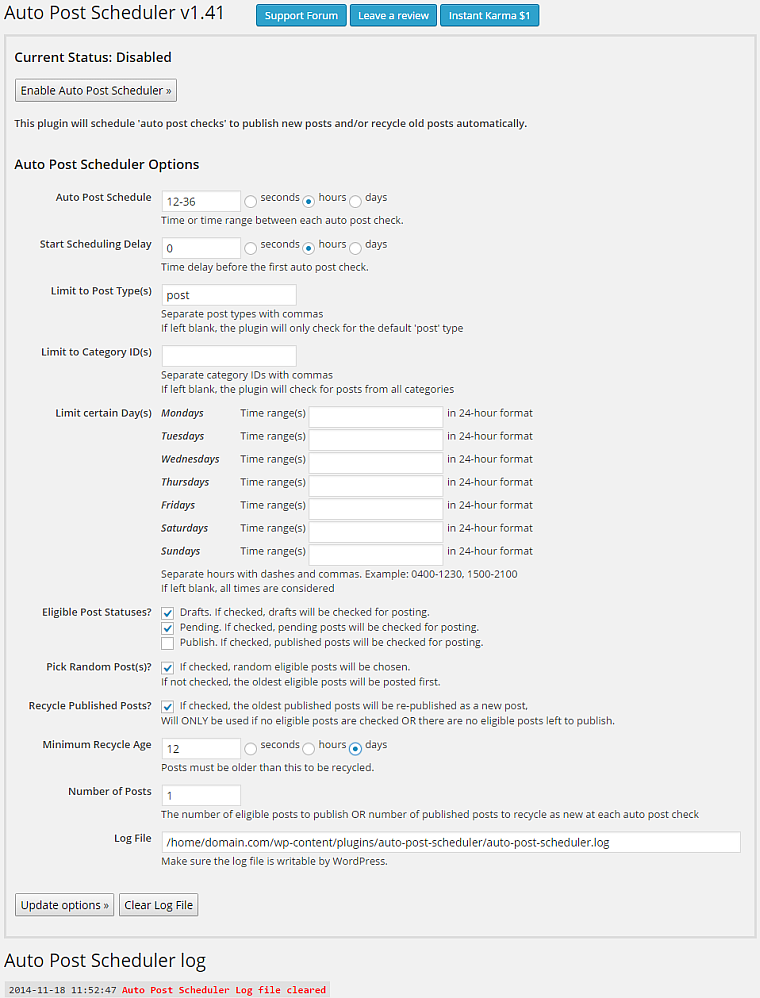
Best WordPress PLugin for Posting to Social Media: Auto Post Scheduler

Screenshot: WordPress.org

Basically, it's one of those few WordPress plugins to schedule posts that takes the full process, with all its particularities, off your back:

From sharing scheduled posts, to recycling old posts to be published, it will automate all posting to social media-related operations.

The END! These are the top 5 WordPress plugins to schedule posts for social media that you should evaluate first when looking for the best social auto poster for your own website.


Share the article

Development

We do Web development

Go to our Web development page!

Visit page!

Do you want a website

or app developed?


Get a Free Quote

and let's make it work!

Get a Quote

Recommended Stories

Tips
Website Security Best Practices

Website Security Best Practices

  Website security is an important consideration for any business or organization with an online presence. With the ever-increasing threats posed by cybercriminals, it is essential to ensure that your website is secure and protected from malicious attacks. Implementing best practices in website security can help protect your website from hackers, malware, and other malicious activities and security issues. This article will discuss some of the best practices for website security and how you can stay away from cybercriminals and improve your security posture.    "Cybersecurity is a shared responsibility, and it boils down to this: in cybersecurity, the more systems we secure, the more secure we all are." - Jeh Johnson Overview of Cybersecurity in 2023 The cybersecurity landscape heads towards a privacy-first approach to information security in 2023. Also, aligning regulations globally will allow businesses to gain more security and data protection.  There are growing voices that give their positive vote to passwordless authentication, which will presumably eliminate the risk of password breaches and amplify organizational security.  However, the rise of the Internet of Things (IoT) devices will likely increase security risks for organizations and expose more security vulnerabilities.  So how can websites cope and become more agile and accessible in this uncertain cyber landscape?   Best Website Security Practices in 2023 At the moment, the best website security practices involve a combination of proactive measures and reactive responses. Proactive measures include implementing strong authentication methods, encrypting data, and regularly patching software. Reactive responses include monitoring suspicious activity and responding quickly to identified security threats or security breaches. Strong Authentication Multi-factor authentication is one of the most important best practices for website security. It involves using two or more factors to verify a user’s identity, such as strong login credentials, and a biometric factor like a fingerprint or facial recognition. This ensures that only authorized users can access the website and its data, protecting it from unauthorized access. Additionally, strong authentication can help protect against phishing attacks, which are attempts to gain access to sensitive information by posing as a legitimate website. Encryption Encrypting data is another significant best practice for website security. Encryption scrambles data so that it can only be read by the intended recipient, making it more difficult for hackers to access sensitive information. It also helps protect against man-in-the-middle attacks, which occur when a hacker intercepts data as it is being transmitted between two parties. Software Patching Software updates are another important best practice for website security. Regularly patching software helps protect against vulnerabilities that can be exploited by hackers. It also ensures that the latest security features are in place, making it more difficult for attackers to access sensitive information. Monitoring and Response Reactive responses like monitoring suspicious activities or responding quickly to identified threats are two valuable tools for website security. Monitoring for suspicious activity can help identify potential threats before they become a problem. Responding quickly to identified threats can help minimize the damage caused by malicious code. Conclusion Keeping websites secure in 2023 involves a combination of proactive measures and reactive responses. These best practices are just some measures you can take to protect your digital assets. If you want to go more in-depth and opt for complex ways to secure your website, don't hesitate to contact Optasy.    Photo credit: Pixabay.... Read more
Raluca Olariu / Jan 25'2023
DrupalTips
Top Drupal Debugging Techniques

Top Drupal Debugging Techniques

  Debugging is an essential part of developing any website, and Drupal is no exception. Debugging in Drupal can be a complex process due to the complexity of the system and its many components. However, with the right techniques, it is possible to identify and resolve issues quickly. In this article, we will discuss some of the top debugging techniques for Drupal that can help you troubleshoot your website more efficiently. We will cover topics such as using the Devel module, using Xdebug, and other helpful tips and tricks. With these techniques in hand, you'll be able to recognize and repair any problems on your Drupal site quickly.     Using the Devel Module for Debugging The Devel module is a powerful tool for debugging Drupal websites. It provides a suite of tools to help you quickly identify and resolve issues. The Devel module includes features such as the ability to view database queries, generate dummy content, and debug PHP code. It also has an API that allows developers to create custom debugging tools. Using the Devel module can be helpful when trying to identify the source of an issue. It can also be used to generate dummy content for testing purposes.     Utilizing Xdebug for Troubleshooting Xdebug is a powerful debugging tool that can be used to troubleshoot issues on Drupal websites. It provides detailed information about the code execution, including stack traces and variable values. This can help developers quickly identify the source of an issue and resolve it more efficiently. Xdebug also has features such as breakpoints, which allow developers to pause the execution of code at certain points to inspect the application's state. This can be helpful when trying to identify and fix complex issues.     Leveraging Drupal's Logging System Drupal's logging system is a powerful tool for debugging websites. It provides detailed information about the events that occur on the website, including errors and warnings. This can be helpful when trying to identify the source of an issue. The logging system also allows developers to set up custom log levels, which can be used to filter out unnecessary information and focus on specific types of events. This can help developers quickly identify and resolve issues.   Using the Drupal Console for Debugging The Drupal Console is a command-line interface that can be used to debug Drupal websites. It provides commands for inspecting the database, generating dummy content, and running tests. This can be helpful when trying to identify and fix issues quickly. The Drupal Console also has an API that allows developers to create custom commands for debugging purposes.   Have You Completed Your Drupal 10 Migration? The release of Drupal 10 marks a major milestone for the platform, and it is important to ensure that your website is up-to-date with the latest version. Migrating to Drupal 10 can be a complex process, but it is essential for ensuring that your website remains secure and performs optimally. When migrating to Drupal 10, it is important to test the website thoroughly and use debugging techniques to identify and resolve any issues. The Devel module, Xdebug, and Drupal's logging system can all be used to troubleshoot any problems that may arise during the migration process. Don't forget to ensure that all of the modules and themes used on the website are compatible with Drupal 10. It is recommended to use the Update Status module to check for any available updates and apply them before migrating to Drupal 10. Additionally, it is a good idea to create a backup of your website before beginning the migration process in case something goes wrong. By taking these steps, you can ensure that your website is properly migrated and running smoothly on Drupal 10.     Conclusion Debugging in Drupal can be a complex process, but with the right techniques, it is possible to debug your website faster and easier. If you need more advice on your next web development project or on your Drupal 10 migration, our team of experts is here to help you. Contact us for more details.   Photo credit: Unpslash.... Read more
Raluca Olariu / Jan 16'2023
DrupalTips
Troubleshoot Your Website in 8 Easy Steps

Troubleshoot Your Website in 8 Easy Steps

  Having a website that runs smoothly is essential for any business. Unfortunately, website issues can arise from time to time and can be difficult to troubleshoot. The good news is that there are some simple steps you can take to identify and resolve common website problems. In this article, we'll discuss eight easy steps you can take to troubleshoot your website quickly and efficiently. With these tips, you'll be able to get your website back up and running in no time. 1. Check Your Server Status. The first step in troubleshooting your website is to check the status of your server. If your server is down or experiencing issues, it could be the cause of any problems you're having with your website. You can check the status of your server by accessing the control panel for your hosting provider. This will give you an overview of any issues that may be affecting your server and allow you to take the necessary steps to resolve them. 2. Review Your Website Logs. After checking your server status, your next step is to review your website logs. Logs are a great way to identify any errors or issues that may be occurring on your website. Reviewing the log files lets you pinpoint the exact source of the problem and take steps to resolve it quickly. Logs can also provide valuable insights into how visitors interact with your website, which can help you optimize your website for better performance. 3. Test Your Website Performance. The third step in troubleshooting your website is to test its performance. This can be done by using a tool such as Google PageSpeed Insights or WebPageTest. These tools will analyze your website and provide you with detailed information about its loading speed, page size, and other performance metrics. This will allow you to identify any areas of improvement that could help improve the overall performance of your website. 4. Inspect Your Code for Errors. If you've tested your website performance, your next step is to inspect your code for errors. This can be done by using a tool such as Firebug or Chrome DevTools. These tools will allow you to view your website's HTML, CSS, and JavaScript code and identify any errors that may be causing issues. Once you have identified the errors, you can take steps to fix them and ensure that your website is running smoothly. 5. Check for Broken Links. The fifth step in troubleshooting your website is to check for broken links. Broken links can cause a variety of issues, such as slow loading times and poor user experience. Various tools can help you identify any broken links on your website, such as Screaming Frog or Xenu Link Sleuth. Once you have identified the broken links, you can take steps to fix them and ensure that your website is running smoothly on all platforms, including mobile devices. 6. Ensure You Have the Latest Updates Installed. Ensuring that you have the latest updates installed is imperative if you want a highly performant website. Outdated software can cause a variety of issues, such as security vulnerabilities and compatibility problems. It's important to keep your website up-to-date with the latest versions of any software or plugins you may be using. You can check for updates by accessing the control panel for your hosting provider or by using a tool such as WP Updates Notifier. 7. Analyze Traffic Patterns to Identify Issues. You should also analyze traffic patterns to identify any issues that may be causing your website to perform poorly. Analyzing traffic patterns can help you identify any areas of your website that may be causing problems, such as slow loading times or high bounce rates. You can use tools such as Google Analytics or Hotjar to track and analyze user behavior on your website. This will allow you to identify any potential issues and take steps to resolve them. 8. Monitor Your Website Regularly. Finally, remember to monitor your website regularly, as it will allow you to identify any potential issues before they become serious problems. You can use tools such as Uptime Robot or Pingdom to monitor your website's uptime and performance. In this way, you can ensure that your website is running smoothly and that any potential issues are identified quickly so that they can be addressed promptly.   Drupal 10 for High Website Performance Drupal 10, launched last month, is the latest version of one of the most powerful content management systems that can help you achieve high website performance. Drupal 10 offers a range of features designed to improve the speed and efficiency of your website, such as caching, minification, and optimization.  Among the best features we can find: Symfony 6 compatibility. Site owners and module developers will benefit from as much Symfony 6 compatibility as possible, and Symfony 4 deprecations in Drupal 9 for Symfony 5 will be resolved. Supported solutions for rebuilding jQuery UI functionality by using either vanilla JavaScript or frameworks like React. jQuery UI components used by Drupal core will be removed. Best practices for deprecating modules. Users will be able to use a proper mechanism for naming, versioning, deprecating wrappers, etc. A 'lifecycle' - property can be used in info.yml files for themes and modules. Better decoupled developer and site builder experiences, especially for menu and URL handling. Introduction of CKEditor 5 with better authoring experience and more modern editing (replacing CKEditor 4). PHP 8.1 compatibility for Drupal 9 and Drupal 10. Theme Starterkit tools for bespoke theme creation. You can learn more about how Drupal 10 can take your website to the next level in this article. Drupal 10 Migration If you're considering migrating to Drupal 10, we can help. Optasy's team of highly skilled developers can help you migrate your website to Drupal 10 quickly and efficiently. We can also provide ongoing support and maintenance for your website, ensuring it runs smoothly and optimally. Contact us today to learn more about our Drupal 10 migration services.   Photo credit: Pixabay.... Read more
Raluca Olariu / Jan 11'2023

Browse cities

×

Toronto

WordPress Development Services in Toronto
iOS App Development Services in Toronto
Drupal Development Services in Toronto
Magento Development Services in Toronto
Laravel Development Services in Toronto

Montreal

WordPress Development Services in Montreal
iOS App Development Services in Montreal
Laravel Development Services in Montreal
Drupal Development Services in Montreal
Magento Development Services in Montreal

Vancouver

Magento Development Services in Vancouver
iOS App Development Services in Vancouver
Drupal Development Services in Vancouver
WordPress Development Services in Vancouver
Laravel Development Services in Vancouver

New York

WordPress Development Services in New York
Laravel Development Services in New York
iOS App Development Services in New York
Drupal Development Services in New York
Magento Development Services in New York

Need a new Project?

Dare us to shape and boost your idea(s)!

Start a Project

(416) 243-2431

Contact

(416) 243-2431

contact@optasy.com

Toronto Downtown

First Canadian Place,
100 King St. W. Suite 5700, Toronto

Toronto West

2275 Upper Middle
Rd. E, Suite 101
Toronto

New York

1177 Avenue of the
Americas, 5th Floor,
New York

Newsletter

Get the latest OPTASY news, tips and how-to’s on the go, right in your inbox!
OPTASY
clutch
Pantheon Premier Partner
  • Drupal 8
  • Services
  • Contact Us
  • Partners

  • Drupal
  • Google
  • Magento
  • Shopify
  • Wordpress
Facebook
Twitter
LinkedIn
Drupal
  • Cities
  • Support

© 2023 All Rights Reserved. Built with Drupal